


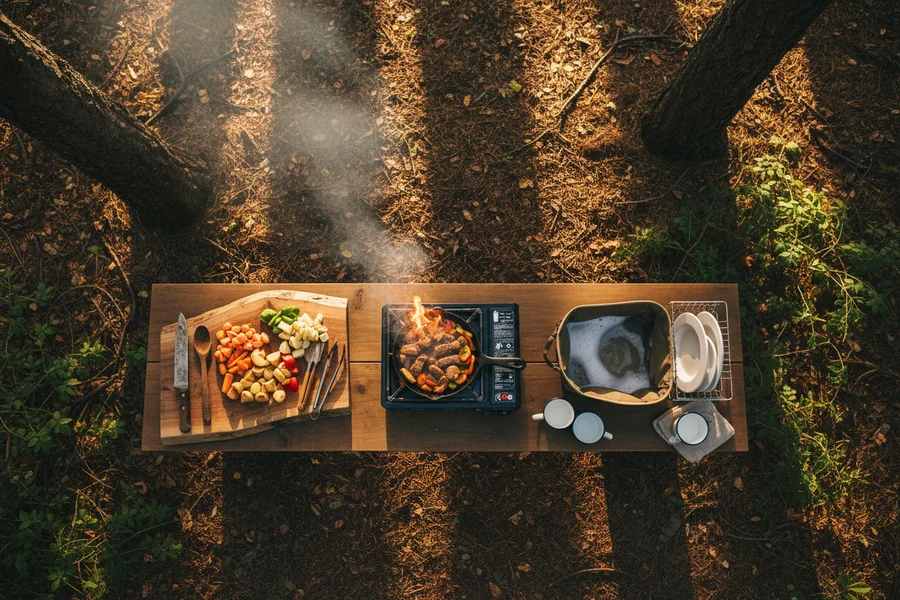
The best camp kitchens come from people who did think it through. It’s simple, actually. Start by planning meals a month ahead in as much detail as possible, then repeat the trip in your mind each evening, picturing how you’ll use every pot, pan, and utensil. The right gear will feel like it’s essential; the rest will stay at home in a drawer where it belongs.
Start With Zones, Not Gear
Home kitchens work because these three understandings underpin everything about family meals: you can’t be in two places at once, you can’t do two things at once, and you don’t want to eat straight off a dirty surface. This triangle keeps your prep, cook, and clean systems from colliding. A camp kitchen needs the same logic. It just has to be compressed so it fits onto a folding table or trailer tailgate.
The stakes are higher than at home. You’re almost certainly further from the store, missing an ingredient isn’t an easy 10-minute fix, and failure arguably tastes better at a picnic table surrounded by friends and late-afternoon sun than it does in your too-quiet dining room.
Try to set up your prep zone first. It’s much better upwind and away from your stove so wind doesn’t blow dust or bugs into open food. Then set up your cooking zone close enough that you can hand off a jalapeño to the cook without dropping it in the stove. But it needs to be far enough away that raw meat juices never touch a cutting board that’s about to hold bread or vegetables. The wash zone goes last in the flow, because it’s often the least impacted by surrounding trip hazards and funnels of humanity.
Build A Kit, Not A Pile
The most significant improvement you can make to a camp kitchen has nothing to do with cookware; it’s organization.
Give every piece of gear a dedicated, labeled, color-coded bin; one for cookware, one for utensils, one for pantry goods, one for cleanup supplies. When everything’s got a home, setup and pack-down cease to be negotiations and become something you can do in under fifteen minutes, even half-asleep. That’s the difference between a kitchen that’s a ritual, and one that’s a punishment by day four.
Dry goods bins in particular. Clear, stackable containers with tight lids not only protect flour, rice, and pasta from moisture and rodents, but when they’re labeled you’re not emptying six bags to find the coffee at 5am.
Choose Your Stove For The Trip, Not The Store
A dual propane burner stove should be your go-to for any serious trip. It offers enough oomph to pump out big meals for a crowd, and enough finesse to simmer a curry or fry an egg without scorching.
But a single stove is a single point of failure. A small isobutane stove makes a perfect backup, or else lean hard on a campfire where they’re allowed, doubling the spill-over prep surface. If your main stove blocks or a valve seizes on day two, you don’t want to go hungry because you’re banking on fixing it in the dark.
Wind is, by far, the biggest waster of fuel in your camp stove. A proper wind screen, or even a barrier made from a car door, a rock wall, or a tarp, can have water boiling with half the fuel in half the time on an exposed site. Skip this and you’re routinely burning through propane twice as fast for no good reason.
Cut Your Cookware, Don’t Expand It
Many campers pack far too many pots and pans. A nesting cookset with a removable handle does boiling, simmering, and sauce duty in a tiny portion of the space full sets take up.
Add one cast iron skillet, or a dutch oven and you’ve taken care of nearly everything else. Cast iron holds heat uniformly, gives a good quick sear, and works over coals just as nicely as it does over a burner – truly useful for one-pot stews or a cobbler on a longer trip. It’s heavy, so it requires a set spot in your kit rather than bouncing loose within a bin and dinging everything else.
Above that – do not yield to the siren call of specialty pans “just in case.” A crowded cook zone slows everyone down and makes cleanup worse. Fewer, better pieces beat a stack of gear you use once.
Run A Two-Cooler System
The real limiting factor on any trip longer than three days, more than food, water, or fuel, is ice. The fix is running two coolers instead of one.
Your daily-use cooler holds drinks and anything opened constantly – it’ll lose cold fast because it’s opened so fast. Your reserve cooler stays sealed and holds perishables you won’t touch until day three, four, or five. Every time you open a cooler, you let warm air in and shorten its ice life, so isolating your high-traffic items protects the food you’re saving for later.
Check temperatures, not just ice levels. The USDA’s food safety guideline is clear on this: Perishable food needs to stay at or below 40°F, and it should never sit in the 40°F-140°F “danger zone” for more than two hours – or one hour if it’s over 90°F outside. A cheap cooler thermometer costs almost nothing and tells you exactly when it’s time to eat something or lose it.
Match Your Kitchen To Your Setup
A tent camper needs a fully self-sufficient kitchen: table, stove, bins, water, all of it packed and unpacked every single day. That’s real work, and it should be respected in your planning rather than treated as an afterthought you’ll figure out on arrival.
Towing changes the equation completely. Vehicles built for extended trips – including many camper trailers – come with integrated or slide-out kitchens that stay assembled between stops. You’re not breaking down a table and repacking bins every morning; the kitchen is part of the rig, and it stays that way until you’re home. That single change removes a meaningful chunk of daily labor from a trip, particularly one running longer than a weekend.
If you’re deciding between tent and trailer setups for a longer trip, weigh this honestly. The gear list for a tent-based kitchen needs to be lean and durable because you’re hauling and reassembling it constantly. A trailer-based kitchen can carry slightly more weight and complexity because it isn’t broken down daily, but it still benefits from the same zone thinking and labeled storage – a messy built-in kitchen is still a messy kitchen.
Plan Meals That Don’t Need A Cooler At All
The most effective way to beat ice loss is by reducing the amount of ice you need in the first place. Shelf-stable ingredients such as cured meats, hard cheeses, root vegetables, and dehydrated bases can last for days without the need for refrigeration. This will give you more space in your cooler for items that actually need to stay cool.
Dehydrated and freeze-dried meals are often criticized for their taste, however, these days there are more modern options available that are actually pretty good. They can serve as a solid backup on evenings when you prefer not to prepare a meal from the beginning. By planning two or three evenings of your menu around these meals, you will significantly reduce the amount of cooler space you need, and also lessen the amount of food scraps to pack out on your way back home.
Set Up A Real Dishwashing Station
Cleanup is the point in most camp kitchens where things fall apart. A three-bucket system – wash, rinse, sanitize – takes but a few minutes to set up and ensures you won’t be doing – or smelling – the greasy part of the last dishes, ones that often get ditched near a tree waiting to be licked clean by the local deer.
Filter as many food scraps as possible from your wash water before disposing. Leave No Trace principles mandate dumping gray water at least 200 feet from camp and any water source, and food scraps will be even more attractive to the wildlife you don’t want visiting camp than they were in the pot. This is all the more important in parks where bear-resistant storage is required; if you’re already locking up food at night, improperly disposing of dish water eliminates half the benefits.
Handle Light and Weather Like They’re Part Of The Design
Cooking after dark without proper lighting turns a simple dinner into a hazard. A battery lantern mounted at eye level, rather than a headlamp pointed straight down at a cutting board, gives you even light across your whole prep and cook zone without blinding whoever’s chopping vegetables next to you.
Rain coverage deserves the same deliberate planning. A tarp or annex over your kitchen area means weather doesn’t cancel dinner, and it protects your stove and dry goods from getting soaked mid-meal. Water storage matters here too – jerry cans dedicated to cooking and cleaning water, separate from drinking water, keep your wash station running without cutting into what you need to drink.
Test It Before You Leave
The last place you want to realize your kitchen setup is flawed is three hours from any store on the first day of a 14-day trip. Boil water. Cook a meal, soup to nuts. Run your entire three-bucket dish station in your driveway.
This is where you discover that your stove burns a little more fuel than you expected. Or that the bins actually don’t fit in the vehicle. Or that your cast iron skillet is heavier than the volume you imagined when you jammed it in the corner of a milk crate.
Do that in your driveway, not at a remote campsite. Do it when mistakes cost you an afternoon, not when they cost you a dinner. Or morale among your hungry campmates.
